
Tutorial Assets
You’ll find most files in the "source" folder. You’ll also need the following 3D models, stock images and brushes to complete this tutorial.- Cyborg 3D model
- Regenerator 3D model
- Rust texture (image 1)
- Brush pack (under tutorials) by Daarken
Step 1
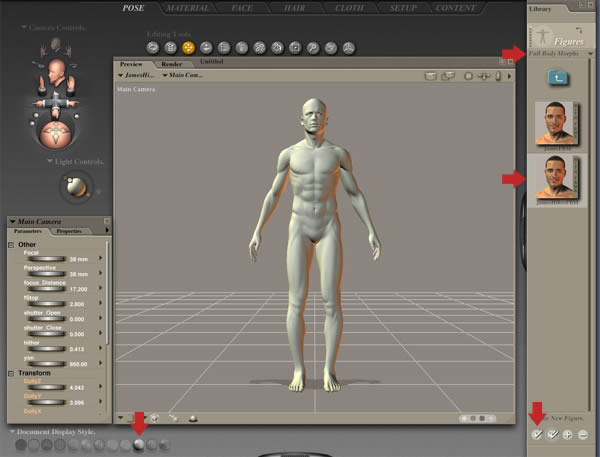
I’ve supplied all the Poser renders in the "source" folder, so if you want to skip this part of the tutorial jump to Step 22.Consult the "readme" files after installing your Poser downloads. Launch Poser, select the default figure in the main viewport and hit delete. Go to Figures > James > Full Body Morphs, then highlight the JamesHiresFBM thumbnail and click the Create New Figure tick at the foot of the tab to load the model. At this point we’re not concerned with textures, so select the Smooth Shaded icon under Document Display Style.
Step 2
Select the entire figure (indicated by the red circle), then set the ectomorphFBM parameter dial to 0.480 to give the figure a slightly emaciated appearance.
Step 3
The different camera views are located in the Camera Controls drop-down menu. Most views can also be accessed with keyboard shortcuts. Press Cmd/Ctrl + comma to switch to the Posing Camera, then select Poses Library > James Pose > Walking. Highlight the Walk 10 thumbnail, then click the single-tick to apply it. We’ll use this preset as the basis to create the required pose.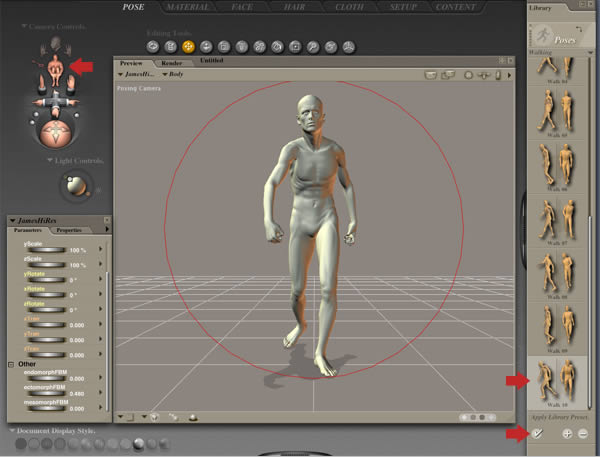
Step 4
The left arm and hand are ideal for the body language we’re after. To mirror this on the other side, choose Figure > Symmetry > Left Arm to Right Arm and click Yes in the following window to copy the joint zone setup as well.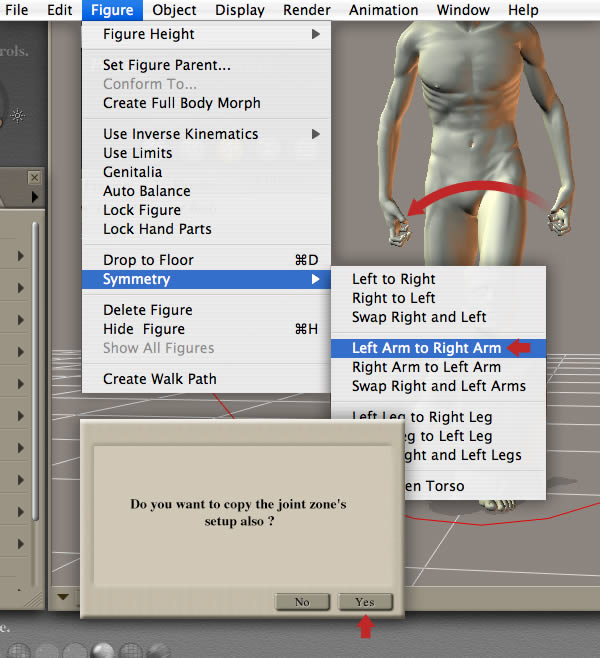
Step 5
Next, we need to arch the figures torso, so select the Chest and modify the Bend parameter dial to -25 degrees. Now select the Abdomen and change the Bend dial to -2 degrees.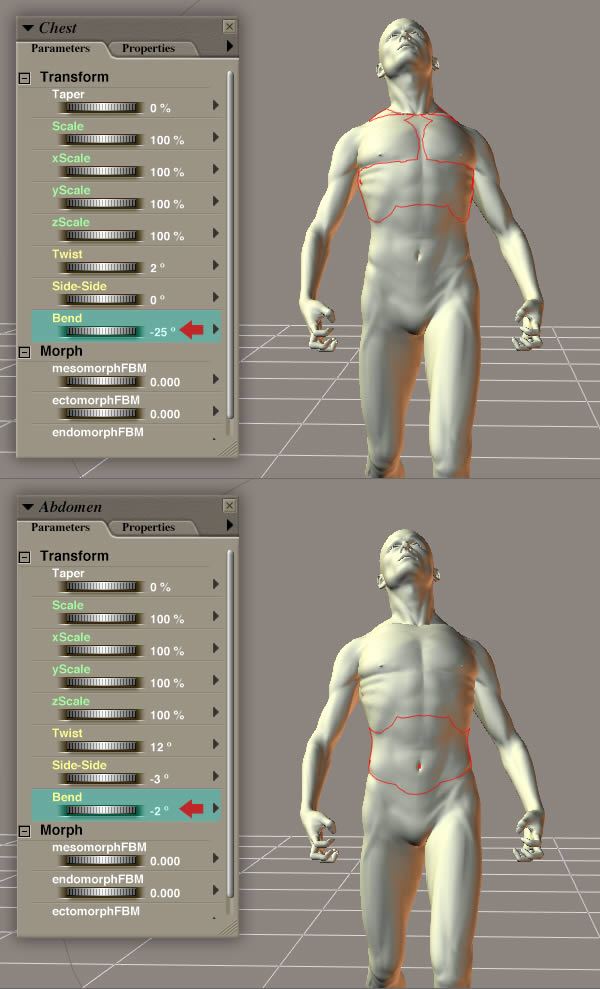
Step 6
In this step we’ll float the figure off the ground plane. For this to work and look natural, check Inverse Kinematics are selected for both legs under the Figure menu. Now select the Hip and set the yTran dial to 0.494.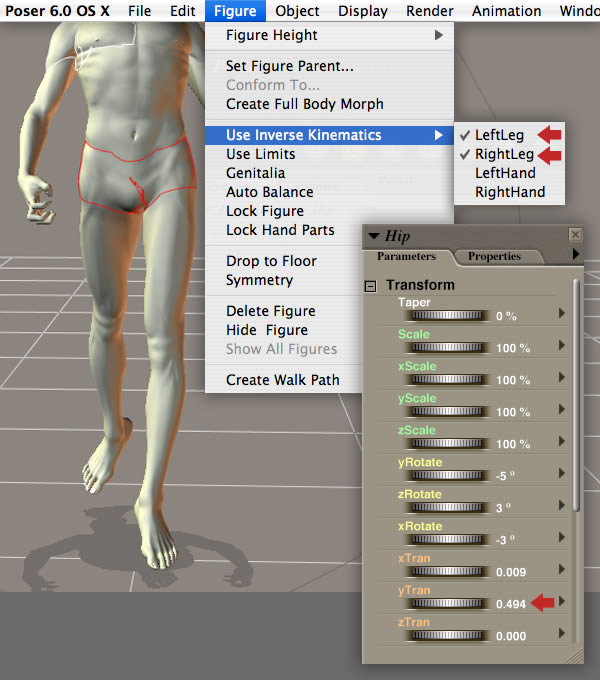
Step 7
Choose the From Right camera view (Cmd/Ctrl + apostrophe), select the Right Foot and copy these settings to move the leg forwards and inwards.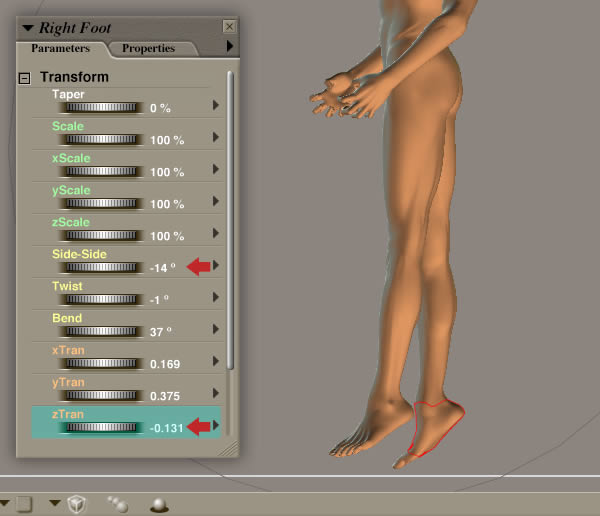
Step 8
That’s the basic body posed – any minor adjustments can be carried out just before rendering. Hit Cmd/Ctrl + equal to switch the Face camera, then select the Head and apply the following expression and morph settings.
Step 9
Activate Texture Shaded under Document Display Style to preview how the figure will appear when rendered, then set the EyesUp-Down dial to -5.500 to roll them upwards.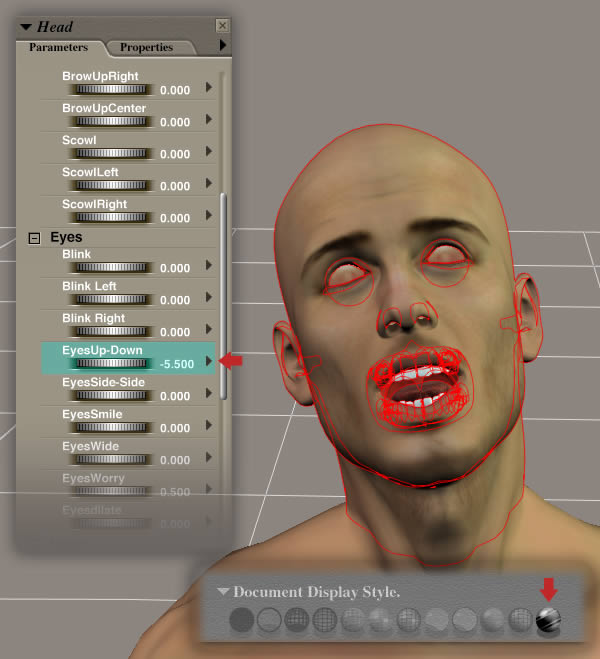
Step 10
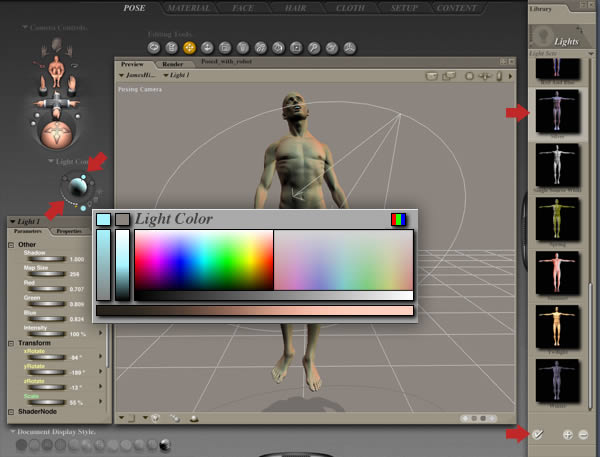
The next stage is to add some lighting. Poser is set up with three-point lighting which is the standard used in visual media such as video, film, still photography and 3D applications.Go back to the Posing Camera, open the Lights tab, then highlight the Silver thumbnail and apply the preset. The best way to understand how Poser’s lights work is to have a play. I changed the middle light color to pale blue and the remaining two as neutral grey. I also dragged their points to reposition them and adjusted their Intensity as indicated by the arrows.
Step 11
Take some time to view your figure from different camera views and carry out any minor tweaks as required. Open the James Pose library, ensure the figure is selected, then click the plus icon to save it and copy the settings in the following pop up windows. Your new preset will now appear in the library as circled.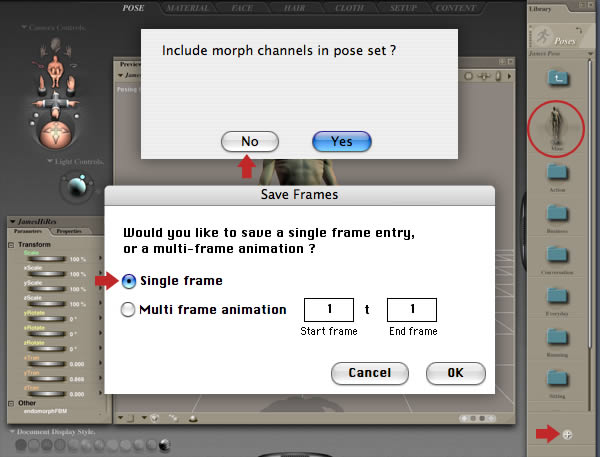
Step 12
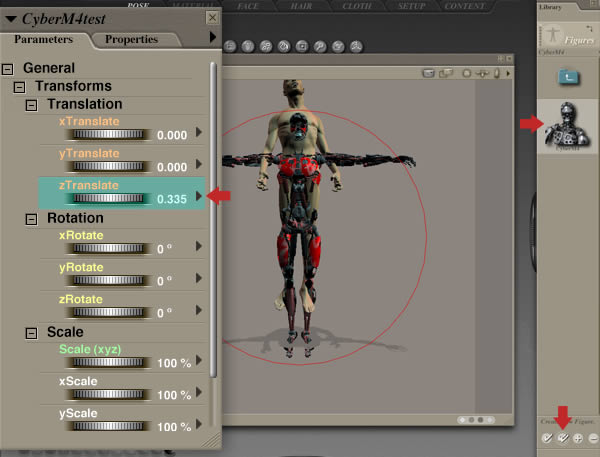
Next, we need to add the cyborg figure. You’ll find him under Figures > DzFire > CyberM4. Highlight the relevant thumbnail to your version of Poser and click the double-tick icon to load as a new figure.Select the whole cyborg figure, then set the zTranslate parameter dial to to 0.335 to move it slightly closer to the camera.
Step 13
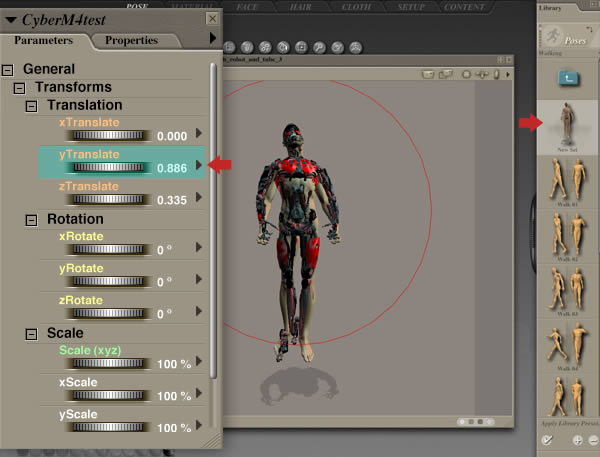
With the cyborg still selected, apply the saved pose from the previous step, then change the yTranslate dial to 0.886 to move the figure up. You’ll notice the cyborg’s feet have gone a little strange, but this is not relevant, as they do not appear in the final image.Don’t sweat over the cyborg’s geometry not fitting the human model – we’ll use Photoshop to fix this later in the tutorial. Matching the cyborg’s head to the human will be the most important factor, which we’ll tackle next.
Step 14
Switch to the Face Camera, select the lowerJaw and set the Up-Down Rotation dial to 8 degrees. Now select the rEye and change the Up-Down Rotation dial to -19 degrees. Repeat this for the the cyborg’s other eye.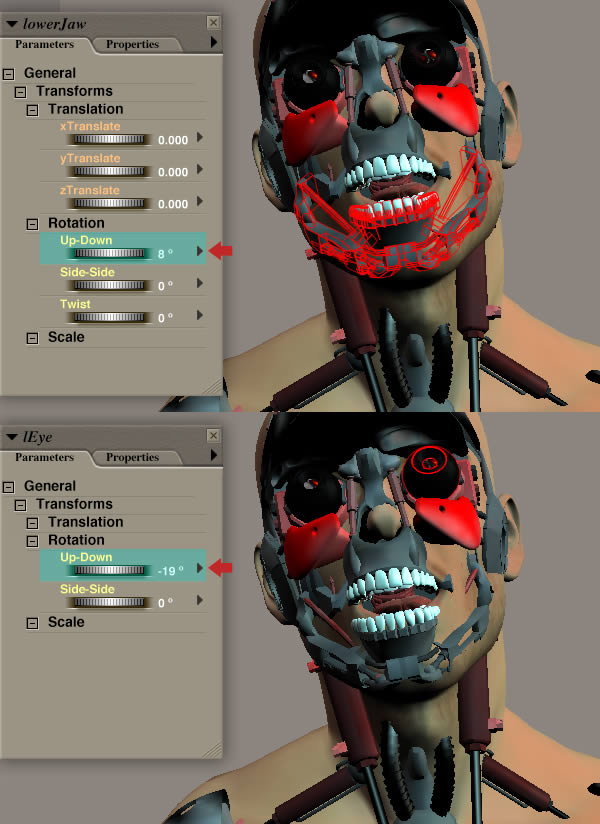
Step 15
We now need to add a material to the cyborg. Ensure the correct figure is selected, then go to Poses > DzFire > CyberM4 and apply the Construct preset.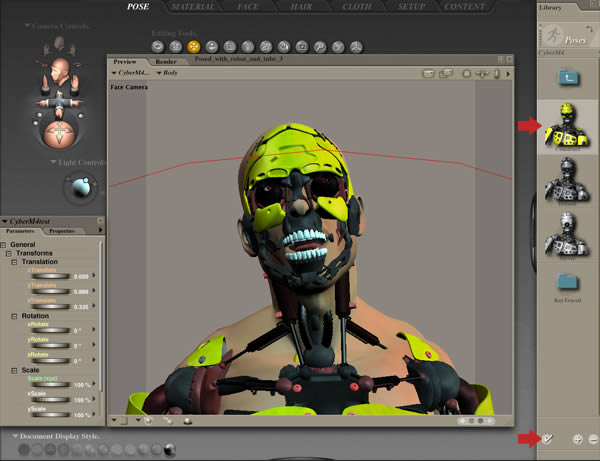


vale publicar el tuto entero y no una parte :S